

Photo by KOBU Agency on Unsplash
Creating a Hello World contract in Solidity
Do what others are talking about by creating your first smart contract and deploy it to a Testnet.


Table of contents


No headings in the article.
There are lots of confusion when it comes to smart development, from the weird syntax to the lots of data generated by a contract.
In this guide you are going to develop your first smart contract , that allow you to write some text to a blockchain, and also retrieve that text, you will also learn how to check the text on etherscan.io after deploying your contract.
Some of the pre-requisite to get started with this are;
- A Metamask account
- Basic knowledge in logical reasoning
So first of, to write any programming language we will need an IDE, (Integrated development environment), lol, your mind skipped, it is just like your normal microsoft word with some toppings, here is where you will be writing your code.
There are lots of IDE out there, but in this guide we will be using Remix, an online IDE that is used specifically for smart contract development.
Once you are on remix, you just need to open the contract folder, you will see some files there, just create a new file and name it "HelloWorld.sol", the .sol in the name here tells the IDE, "Hey bro, this is a solidity file".
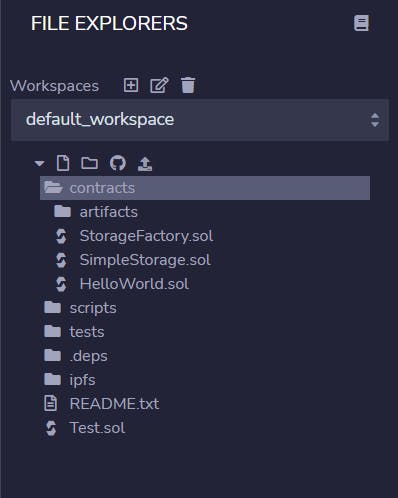
Mine is shown in the image above,
In your new file, add the following text
// SPDX-License-Identifier:MIT

pragma solidity >=0.6.0 <0.9.0;

contract HelloWorld{

}
what we did here is simply saying "hey Remix, I want to create a contract with the name "Hello World", but before that, I have a license from MIT, so you need to compile this contract with version 0.6.0 to 0.9.0 of yourself"
EZPZ, you have created your first contract, so what next?
Now we need to include a variable in our contract,
string text = "Hello World";
Here we created a variable that stores string, simply put, a type of data that are not numbers, but here we gave it an initial value of "Hello World".
The variable we just created is a state variable, because we need it for our contract to function properly.
Next we create two functions, writeText and retrieveText, as shown below
  function writeText(string memory _text) public {
            text = _text;
    }

    function retrieveText() public view returns(string memory){
        return text;
    }
I know you are now like, Lukman, you said it is gonna be easy, but what are all this?😅
Yea, what we did up there is just saying, "Hey remix, i am creating writeText to write some text to the blockchain, and also retrieve it with the retrieveText function"
The 'public' keyword here is just saying, "I want everyone to see see this",
'view' keyword is like saying, "Heyyo, I just want to check some things here "
'Memory' is just saying "Store this value, give me only when i ask"
One more thing here, in the writeText function, we have the '_text', this is just a way for us to differentiate 'text' (our state variable) from '_text' (a parameter) that we need to run the writeText function.
Still confused? Yea, it will get clearer with practice.
so far, this is what you should have in your contract;
// SPDX-License-Identifier:MIT

pragma solidity >=0.6.0 <0.9.0;


// Create a “Hello World” contract with a constructor, at least two functions,
//and a state variable, and Deploy to a Testnet (Rinkeby).

contract HelloWorld{
   string text = "Hello World";


//Write to the Blockchain
    function writeText(string memory _text) public {
            text = _text;
    }

//Get your text from the blockchain
    function retrieveText() public view returns(string memory){
        return text;
    }
}
P.S: any line in solidity that starts with '//' is ignored, so I describe what our program is doing.
Yea, you now have your first smart contract ready to be tested.
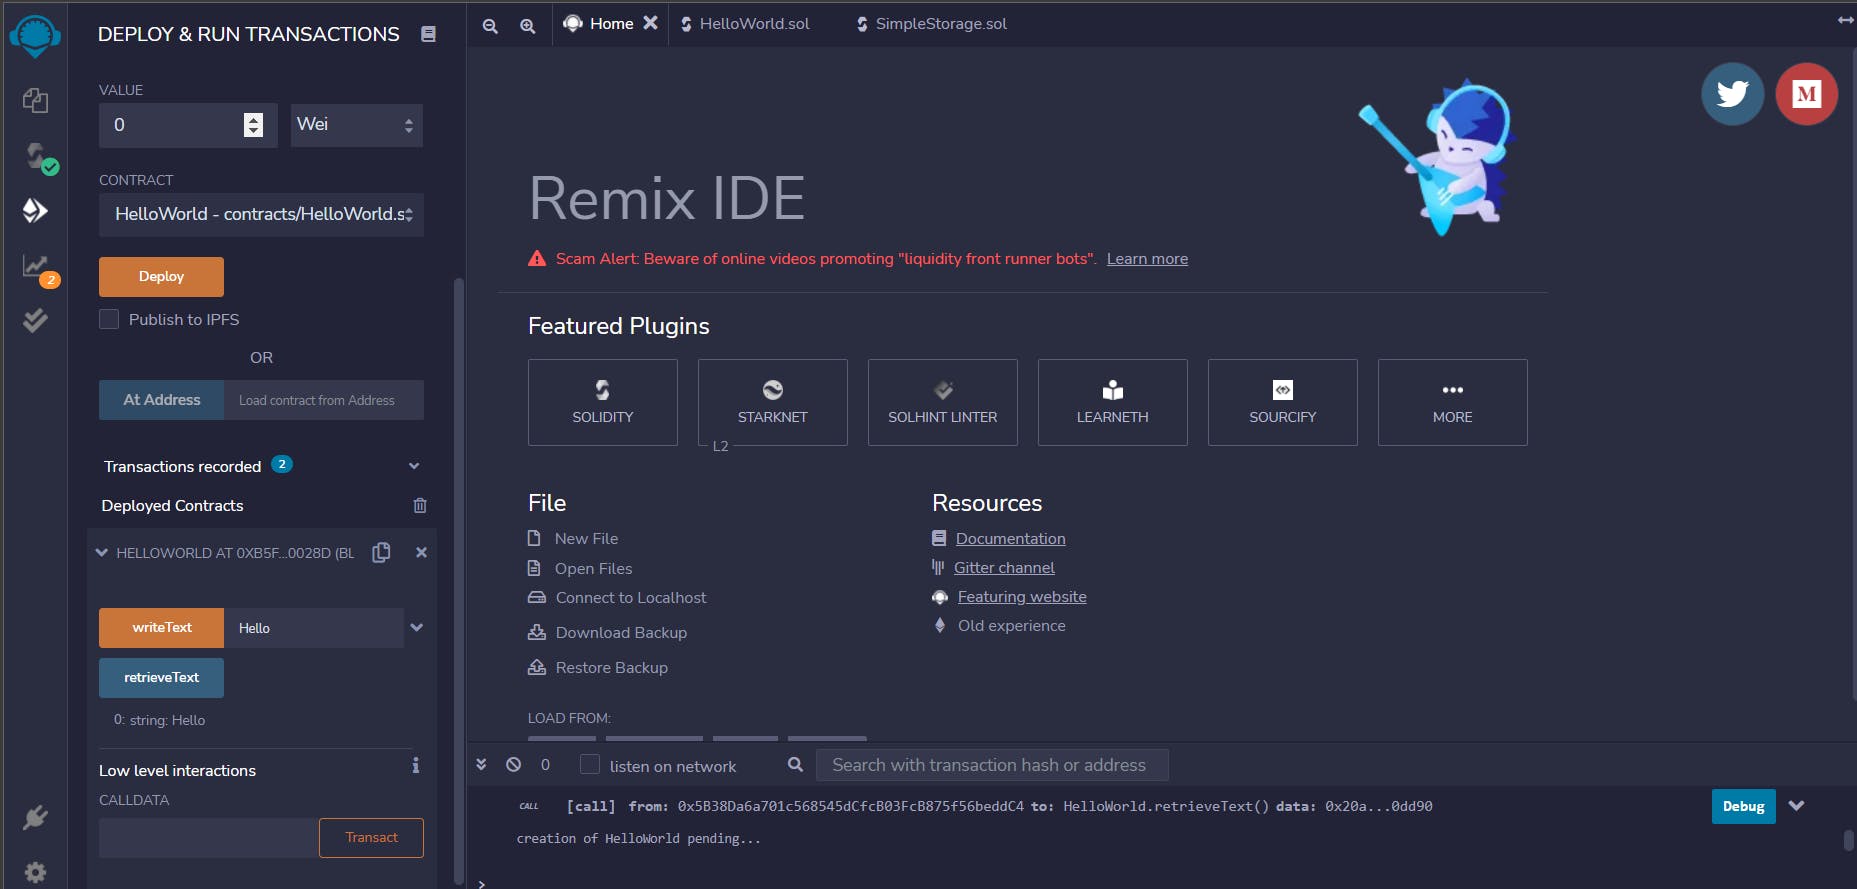
On Remix we have this sections.

Click on the third Icon, that is where we will deploy our contract.
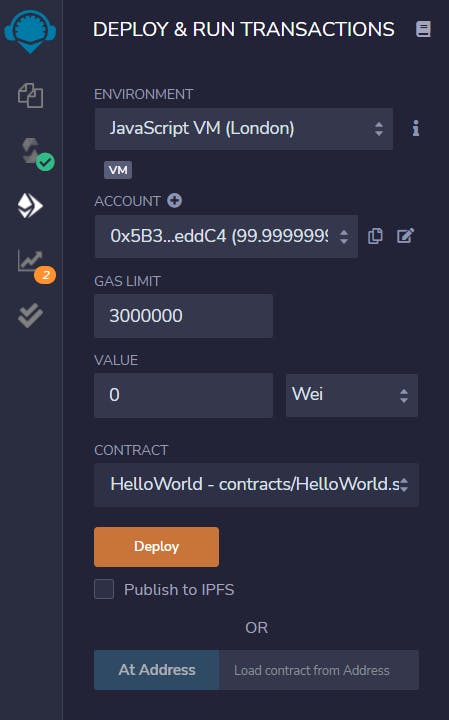
Choose your HelloWorld Contract, from the drop down, and click on deploy.
At the bottom of that panel, you will see this , click on it , it should show you some details about your contract. here is mine.
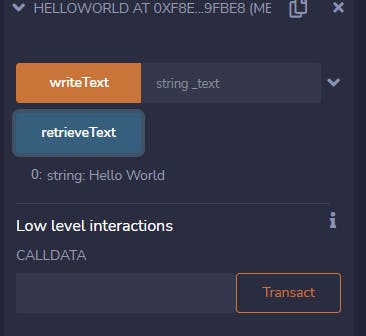
Hurray, you just deployed your first smart contract locally.
Now you can click on the WriteText and retrieveText to see your text, you can also input some text in front of the WriteText. and you will see the text your entered after clicking retrieveText.
We are almost done, now you need to setup your metasmask account, check here on how to go about it, once you are done creating your account and installing the metamask extension, Let's continue.
Now you have your metamask account, switch to the rinkeby testnet ,
To interact with the blockchain you need some funds(ether), but here we will be using a fake money. You can get your fake ethers here
Once you have your fake ether in your wallet, now change your environment to "Injected Web3", this will make metamask popup, just confirm the transaction, you will have rinkeby and your wallet balance as shown in this image.

Now if you click on deploy, Metamask will pop up again, confirm the transaction, then whew, your contract is now live on the rinkeby Testnet.
Try interacting with the writeText and the retrieveText in the deployed section. What do you notice?
You should see something like this at the bottom of your program.

Click on the 'view on etherscan', to see your contract live on the Rinkeby Testnet.
On etherscan, it will take some time for your contract to display the full data, you should see this after few minute of patience
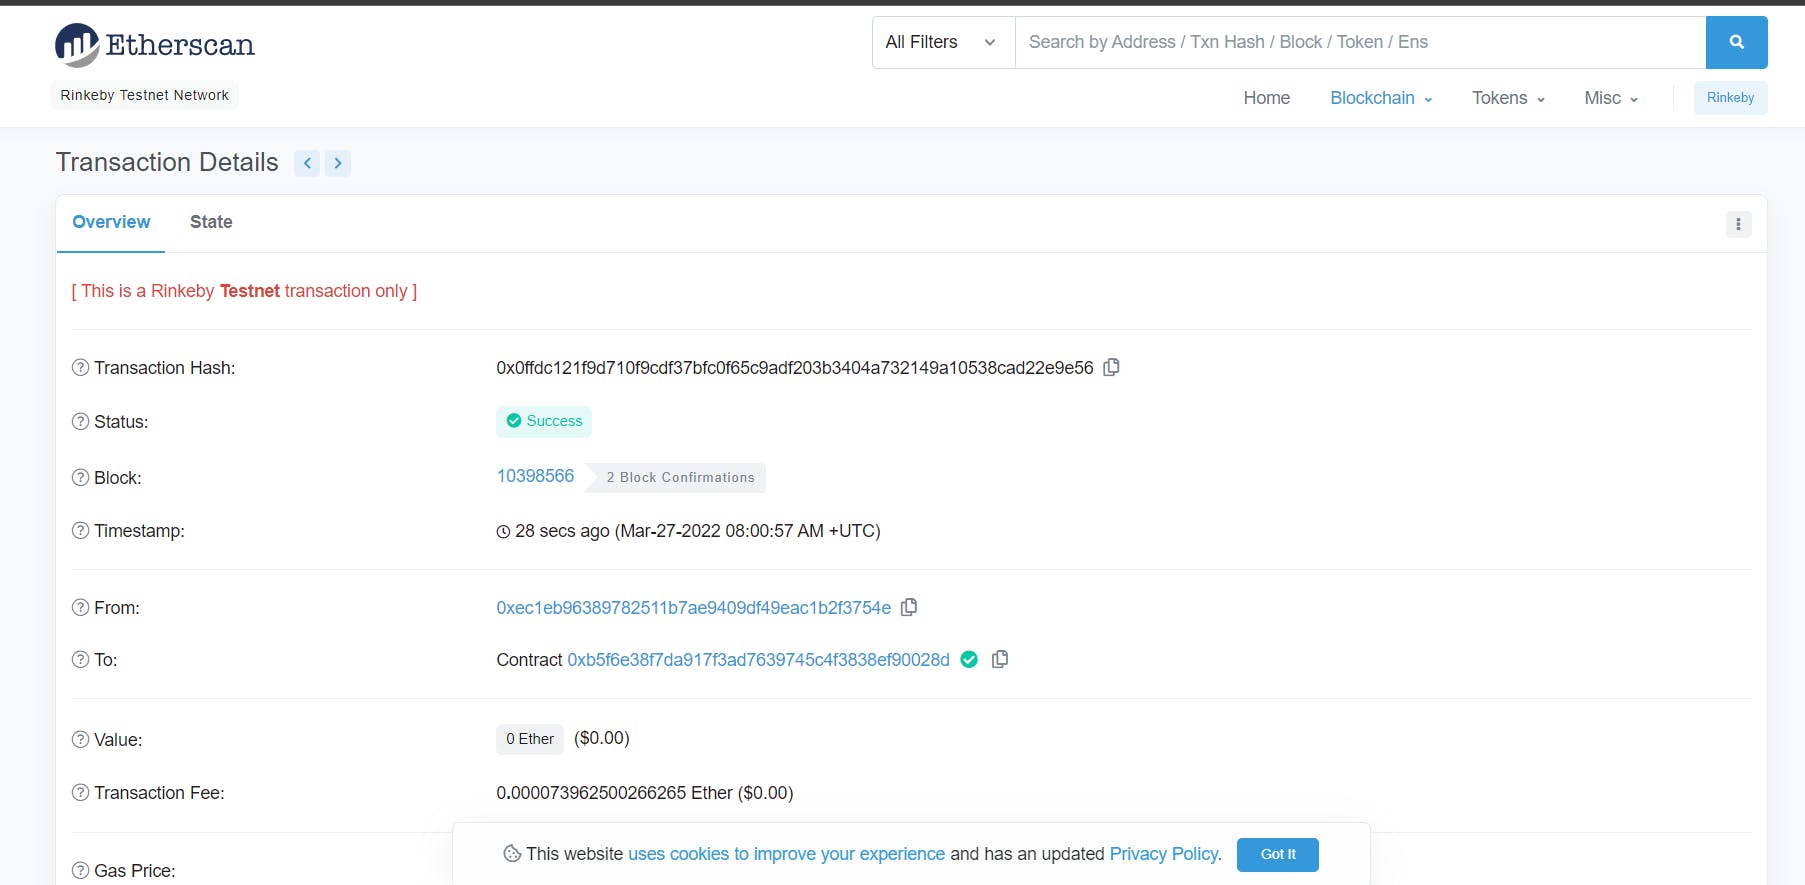
Now to see your text on the Blockchain, Click on the View more button, and click on the Input data, you should see your text on the blockchain.
You are now a step ahead by doing what other people are talking about.😎
Follow me on twitterand Linkedin, for more blockchain related stuff. I promise to drop some awesome blockchain projects.
Have a great weekend.